Why Your Chocolate Shell Hardens: The Marvelous Science & Sweet Uses
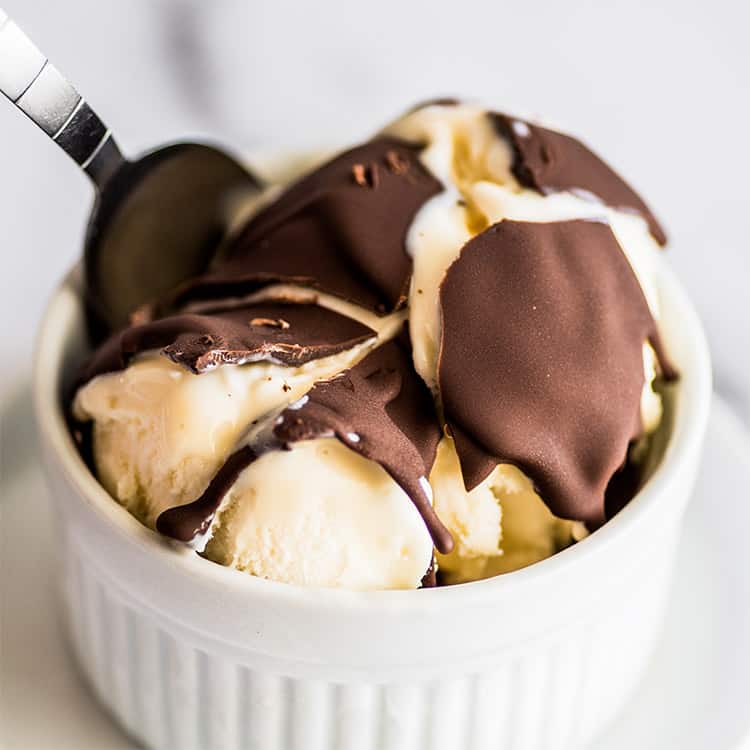
There's a certain magic to pouring a silky stream of chocolate over a cold dessert, only to watch it instantly transform into a crisp, satisfying shell. That delightful "snap" as you break into it adds an extra layer of enjoyment to everything from a simple scoop of ice cream to a decadent sundae. But what exactly is happening during this seemingly magical transformation? The secret lies in a fascinating interplay of science, temperature, and a common pantry ingredient. Understanding *why* your chocolate shell hardens isn't just trivia; it's the key to perfecting your own homemade version and unlocking a world of sweet possibilities.
The Science Behind the Snap: Coconut Oil's Cold Secret
At the heart of every perfectly hardened chocolate shell is a simple, yet powerful scientific principle governed by one star ingredient: coconut oil. Unlike many other fats and oils, coconut oil possesses a unique characteristic that makes it ideal for creating this brittle, satisfying coating.
The "magic" of coconut oil comes down to its melting point. Coconut oil is predominantly composed of saturated fats, which are solid at room temperature. Specifically, its melting point hovers around 76°F (24.4°C). This means that above this temperature, coconut oil is a liquid, giving your chocolate shell mixture its smooth, pourable consistency. However, as soon as the temperature drops below this threshold, the saturated fats rapidly solidify.
When you combine melted chocolate with coconut oil and then pour this warm mixture over anything intensely cold – be it a scoop of ice cream, frozen fruit, or an iced beverage – the dramatic temperature difference triggers an immediate reaction. The freezing surface rapidly draws heat away from the chocolate and coconut oil blend. As the coconut oil cools below its melting point, it solidifies almost instantly, locking the chocolate particles in place and forming a hard, brittle shell. This rapid crystallization is what creates that distinctive, satisfying *snap* that store-bought and homemade chocolate shells are famous for. Other vegetable oils, like canola or sunflower oil, have much lower melting points and remain liquid even when cold, which is why they don't produce the same hardening effect.
Crafting Your Own Chocolate Shell: Ingredients & Technique for Perfection
Making your own chocolate shell at home is surprisingly simple, often requiring just two ingredients. However, a few key choices can elevate your results from good to truly exceptional.
The primary ingredients are, of course, chocolate and coconut oil. For the chocolate, while chocolate chips can work, many contain stabilizers that make them resistant to melting smoothly. For the best consistency and flavor, we highly recommend using
baking chocolate (such as unsweetened, semi-sweet, or bittersweet chocolate bars chopped into pieces) or high-quality chocolate wafers. These melt more uniformly and contribute to a richer final product.
The choice of coconut oil is equally important. Opt for
refined coconut oil. Unrefined or virgin coconut oil has a distinct coconut flavor that can easily overwhelm the taste of your chocolate, unless you specifically desire that tropical note. Refined coconut oil, on the other hand, is neutral in flavor, allowing the pure chocolate taste to shine through.
The ratio of chocolate to coconut oil is crucial for achieving the perfect pourability and snap. A common starting point is a 2:1 ratio of chocolate to coconut oil by weight (e.g., 8 ounces of chocolate to 4 ounces of coconut oil). You can adjust this slightly based on your desired thickness and hardness; more coconut oil will result in a thinner, slightly softer shell, while less will yield a thicker, firmer coating.
Melting your ingredients correctly is the final piece of the puzzle. The gentlest method is using a double boiler. Place a heat-safe bowl over a pot of simmering water, ensuring the bowl doesn't touch the water. Add your chocolate and coconut oil, stirring regularly until completely smooth and melted. If you don't have a double boiler, a microwave can also be used, but with caution. Microwave in short bursts (15-30 seconds), stirring well after each interval, to prevent the chocolate from burning or seizing. The goal is a perfectly smooth, homogenous liquid.
Once melted, simply pour your homemade chocolate shell into a clean jar, and it's ready for action! For a detailed, step-by-step guide, be sure to check out our article on
Homemade Magic Chocolate Shell: Easy 2-Ingredient Recipe.
Beyond the Scoop: Creative & Sweet Uses for Your Chocolate Shell
While the classic pairing of chocolate shell with ice cream is undeniably a match made in dessert heaven, the versatility of this magical topping extends far beyond the sundae bowl. Once you have a jar of homemade chocolate shell in your pantry, you'll discover endless sweet uses.
*
Ice Cream Extravaganza: Of course, sundaes, milkshakes, and iced coffees are just the beginning. Transform a simple scoop of vanilla ice cream into a gourmet treat, or elevate your morning coffee with a hardened chocolate drizzle.
*
Hand-Dipped Delights: Take your desserts to the next level by hand-dipping. Think homemade ice cream cones dipped in chocolate shell, ice cream bars coated for that perfect crunch, or frozen banana slices and strawberries given a snappy chocolate jacket. These are fantastic for parties or as quick, satisfying treats.
*
Fruit Fiesta: Chill grapes, orange segments, or melon balls, then drizzle them with chocolate shell for a refreshing and elegant snack. The cold fruit will immediately set the chocolate, creating a lovely contrast in textures.
*
Pastry & Baked Goods Glaze: Once your cakes, cupcakes, or donuts are fully cooled, you can drizzle or dip them into chocolate shell for a shiny, hardened glaze that adds visual appeal and a delightful crunch.
*
Savory-Sweet Surprises: Don't limit yourself to just fruit! Try dipping pretzels, potato chips (for a truly unique experience), or even crisp bacon strips (once cooled) into your chocolate shell for an intriguing sweet-and-salty combination.
*
Flavor Fusion: Get creative with additions! Stir a teaspoon of peanut butter into your melted chocolate shell for a chocolate peanut butter version. A dash of mint extract, orange zest, or a pinch of chili powder can introduce exciting new flavor profiles. Always ensure any additions are oil-based or dry to avoid seizing the chocolate.
Storing & Troubleshooting Your Perfect Chocolate Shell
One of the great advantages of homemade chocolate shell is its impressive shelf life and ease of storage. When stored properly, a batch can last for several weeks, if not months, ensuring you always have a quick dessert enhancer on hand.
Your chocolate shell is liquid at room temperature and solidifies when cold. Therefore, it's best to store it in an airtight jar at
room temperature. This keeps it in its pourable state, ready for immediate use. Storing it in the refrigerator will cause it to solidify, and while that's not a problem, it means you'll need to reheat it before each use.
If you do prefer to store your chocolate shell in the fridge, or if it solidifies in a cooler pantry, reheating is simple. Just remove the lid (or loosen it significantly to allow steam to escape) and microwave it in 15-20 second intervals, stirring well between each, until it's liquid and smooth again. A double boiler can also be used for reheating, just as you would for the initial melting.
Even with the simplest recipes, a few common issues can arise. Here's some troubleshooting advice:
*
My chocolate shell isn't hardening! This usually means there isn't enough coconut oil in your mixture, or the dessert you're pouring it over isn't cold enough. Ensure your ice cream or fruit is truly frozen. You can also add a tiny bit more melted coconut oil to your shell mixture to encourage faster setting.
*
My chocolate shell is too thick/thin. If it's too thick, gently reheat and stir in a little more melted coconut oil, a teaspoon at a time, until the desired consistency is reached. If it's too thin or oily, you may have added too much coconut oil. You can try melting in a bit more chocolate to balance the ratio.
*
My chocolate shell looks grainy or seized. This often happens if the chocolate gets too hot (especially in the microwave) or if even a tiny drop of water gets into your chocolate during the melting process. Unfortunately, seized chocolate is difficult to salvage for a smooth shell. Prevention is key: melt gently and ensure all utensils and bowls are completely dry.
For more in-depth knowledge on optimizing your ingredients and storage methods to ensure your homemade chocolate shell is always perfect, read our detailed guide:
Master Homemade Chocolate Shell: Ingredient & Storage Secrets.
Conclusion
The "magic" of a hardening chocolate shell is no mystery, but rather a delightful demonstration of food science at play. By understanding the unique properties of coconut oil and applying a few simple techniques, you can easily create this beloved topping right in your own kitchen. From the satisfying snap over ice cream to innovative dips and drizzles, homemade chocolate shell opens up a world of creative sweet possibilities. So go ahead, embrace the science, experiment with flavors, and enjoy the pure delight of your perfectly hardened, homemade chocolate shell.